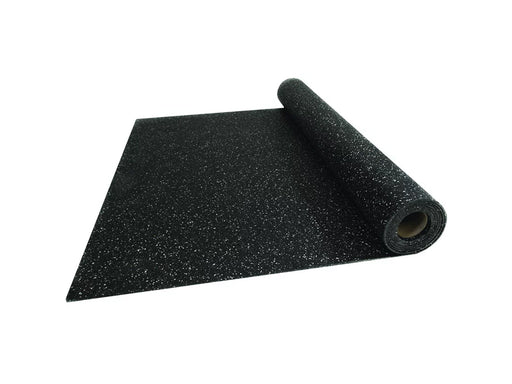
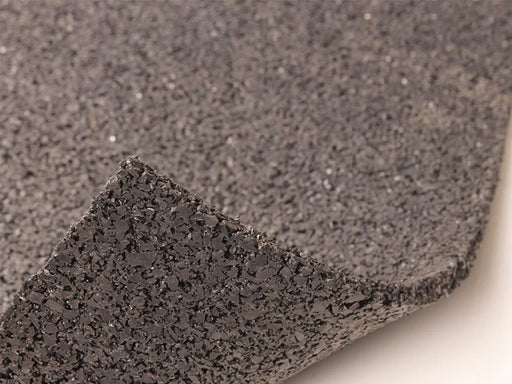
Creating a high-performance home gym starts with the right flooring. The Interlock8 Home Gym Flooring Tile is an 8mm thick, puzzle-style rubber mat designed specifically to provide a durable, impact-resistant, and noise-reducing surface for fitness enthusiasts.
Made from recycled rubber, these tiles offer an eco-friendly and hard-wearing solution for any workout space. Whether you're lifting weights, practicing high-intensity exercises, or setting up a multi-purpose gym, Interlock8 tiles protect your floor, reduce noise, and enhance overall workout performance.
What is a Gym Flooring Mat?
A gym flooring mat is a protective surface designed to provide shock absorption, noise reduction, and stability in fitness areas. These mats help safeguard both the floor and exercise equipment from damage while also improving comfort and safety for users.
Typically made from high-density rubber, gym mats are available in different formats such as interlocking tiles, rolls, and standalone mats, making them adaptable for various gym setups.
How Does a Home Gym Flooring Mat Work?
A home gym flooring mat functions as a barrier between your workout routine and the floor, absorbing impact and reducing vibrations. Its dense rubber construction serves multiple purposes:
-
Shock Absorption – Softens the impact of dropped weights and high-impact exercises.
-
Noise Reduction – Minimises sound transmission, making workouts quieter.
-
Slip Resistance – Provides a secure footing to reduce the risk of accidents.
-
Floor Protection – Prevents scratches, dents, and wear from gym equipment.
By installing Interlock8 tiles, you create a safe and effective workout environment that is both comfortable and long-lasting.
How Effective is the Interlock8 Home Gym Flooring Tile?
The Interlock8 Home Gym Flooring Tile is engineered to handle intense workouts and heavy equipment. Its 8mm thickness delivers outstanding protection, making it one of the best flooring choices for home gyms.
Key Performance Features:
-
Superior Shock Absorption – Reduces strain on joints and safeguards flooring.
-
Durable and Resilient – Designed to withstand rigorous use and heavy weights.
-
Noise and Vibration Control – Minimises disturbances in shared living spaces.
-
Secure Interlocking System – Ensures a seamless fit that stays in place during workouts.
With its long lifespan and low maintenance, Interlock8 flooring tiles provide a cost-effective and high-performance solution for home fitness enthusiasts.
Where Can the Interlock8 Home Gym Flooring Tile Be Used?
The Interlock8 tiles are highly versatile and suitable for a range of fitness environments, including:
-
Home Gyms – Ideal for weightlifting, cardio workouts, and functional training.
-
Garage Gyms – Protects concrete flooring and adds insulation.
-
Multi-Purpose Workout Areas – Can be used for everything from yoga to high-intensity training.
-
Strength Training Zones – Reduces impact damage from weights.
-
Stretching and Mobility Spaces – Provides a comfortable surface for flexibility training.
Thanks to their modular design, these tiles can be easily expanded or relocated, allowing for flexibility in different setups.
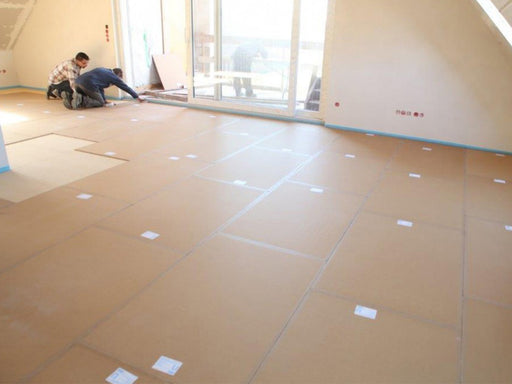
How to Install the Interlock8 Home Gym Flooring Tile
Installing Interlock8 flooring tiles is quick and requires no special tools or adhesives.
Step-by-Step Installation Guide:
-
Prepare the Surface – Ensure the floor is clean, dry, and free from dust or debris.
-
Start in a Corner – Begin placing tiles from one corner of the room.
-
Connect the Tiles – Align the puzzle-style edges and firmly press them together.
-
Trim for a Perfect Fit – Use a utility knife to cut tiles as needed for edges and corners.
-
Check the Alignment – Make sure all tiles are flush and securely interlocked.
The puzzle-style interlocking system allows for quick assembly, making it easy to adjust or remove tiles if needed.
What Are the Benefits of Using the Interlock8 Home Gym Flooring Tile?
The Interlock8 Home Gym Flooring Tile provides a range of benefits that enhance the functionality of your home gym:
-
Impact Protection – Reduces stress on floors and joints, improving workout safety.
-
Noise Reduction – Absorbs sound and vibrations, making workouts quieter.
-
Slip Resistance – Provides a stable, non-slip surface for exercises.
-
Easy Installation – No adhesives required; tiles interlock for a secure fit.
-
Durability – Built to withstand heavy weights and frequent use.
-
Eco-Friendly – Made from recycled rubber for an environmentally responsible choice.
Why Use a Gym Flooring Tile?
Using a gym flooring tile is essential for anyone serious about home fitness. It helps:
-
Prevent Floor Damage – Protects hardwood, tile, and concrete surfaces.
-
Enhance Comfort – Reduces joint impact and fatigue during workouts.
-
Reduce Noise Levels – Creates a quieter workout space in shared or residential settings.
-
Improve Hygiene – Provides an easy-to-clean, dedicated gym surface.
Interlock8 tiles are an efficient and effective flooring solution that deliver performance, protection, and durability.
How to Clean and Maintain Gym Flooring Tiles
Keeping your Interlock8 flooring tiles in good condition is simple with regular maintenance.
Daily Cleaning:
-
Sweep or vacuum to remove dust and debris.
-
Wipe spills immediately with a damp cloth.
Deep Cleaning:
-
Mop with warm water and mild detergent when needed.
-
Avoid using harsh chemicals or excessive water.
-
Allow tiles to dry completely before resuming workouts.
Preventative Care:
-
Avoid dragging heavy equipment across the tiles.
-
Rotate high-use tiles occasionally to ensure even wear.
With proper care, Interlock8 tiles will remain in top condition for years.
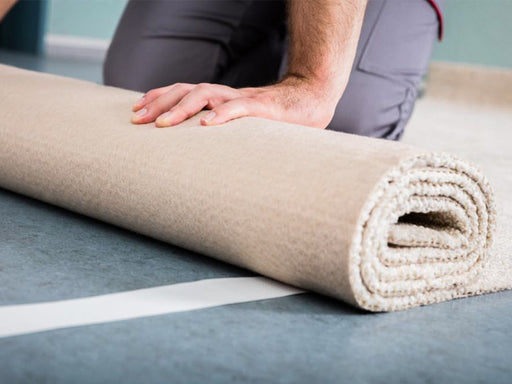
Can the Interlock8 Home Gym Flooring Tile Be Installed Over Carpet?
Yes, but with some considerations:
-
Low-Pile Carpet: Tiles can be placed directly on short-fibre carpets with a firm, stable base.
-
High-Pile or Plush Carpet: Not recommended, as soft surfaces may cause the tiles to shift.
For the best results when installing over plush carpet, placing a plywood board underneath the tiles improves stability and performance.
The Interlock8 Home Gym Flooring Tile is a high-quality, durable, and eco-friendly flooring solution for any fitness space. Designed for shock absorption, noise reduction, and maximum durability, these tiles provide the ideal foundation for a safe and effective workout environment.
Whether you're setting up a home gym, garage gym, or multi-use workout area, Interlock8 flooring tiles offer a professional-grade fitness surface that enhances comfort, performance, and protection.
How to Install SilentGym Interlock8 Home Gym Flooring Tile
The SilentGym Interlock8 Home Gym Flooring Tile is designed for easy installation, whether you choose to dry lay or glue it down for a more permanent fit. Thanks to its interlocking puzzle-style design, the tiles fit securely without the need for adhesives, but for extra stability, they can also be bonded to the floor using GenieMat Glue or any standard flooring adhesive.
Unlike thicker rubber mats, SilentGym Interlock8 does not require additional ramps or corner pieces—for a clean edge, simply trim the interlocking lugs using a sharp Stanley knife and a straight edge.
Follow this step-by-step guide to install your home gym flooring quickly and efficiently.
What You’ll Need
- SilentGym Interlock8 Tiles
- Measuring Tape
- Chalk Line or Pencil
- Utility Knife (Stanley Knife) with sharp blades
- Straight Edge or Metal Ruler
- Rubber Mallet (optional, for securing interlocking edges)
- GenieMat Glue or Standard Flooring Adhesive (if choosing a permanent installation)
- Trowel (if applying adhesive)
Step-by-Step Installation Instructions
Step 1: Prepare the Surface
Before installing SilentGym Interlock8 tiles, ensure the subfloor is:
- Clean – Sweep and vacuum to remove dust, dirt, and debris.
- Dry – Moisture can affect adhesive bonding if gluing down the tiles.
- Flat & Stable – Fill any cracks or uneven areas for the best performance.
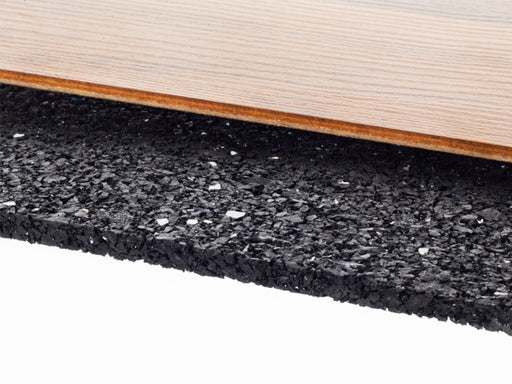
SilentGym Interlock8 can be installed over concrete, plywood, vinyl, or existing flooring, making it a versatile option for home gyms.
Step 2: Plan Your Layout
- Measure your room dimensions and mark the centre point with chalk or a pencil.
- Lay out a few tiles without connecting them to check how they fit in the space.
- Start from a corner or along a straight wall for the best alignment.
- If you need a clean edge against a wall, cut the interlocking lugs off the perimeter tiles (explained in Step 5).
Step 3: Dry Lay Installation (No Adhesive)
For temporary or floating installations, follow these steps:
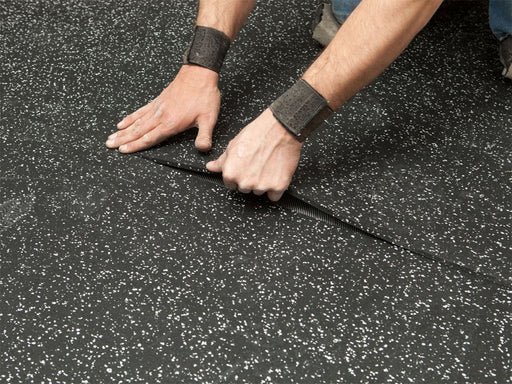
- Begin in a corner and work outward, interlocking tiles like a puzzle.
- Press tiles together firmly by hand or use a rubber mallet for a snug fit.
- Continue laying tiles row by row, ensuring a tight and seamless connection.
- If the tiles reach a wall or fixed object, trim them to fit using a Stanley knife and straight edge.
Tip: If you want a secure fit without adhesive, consider using double-sided carpet tape under the edges of the tiles.
Step 4: Glue-Down Installation (For a Permanent Fit)
For permanent installations, SilentGym Interlock8 can be glued down using GenieMat Glue or any standard flooring adhesive.
Applying Adhesive:
- Spread the adhesive with a trowel, covering only a small area at a time to prevent premature drying.
- Lay the tiles immediately into the adhesive, pressing down firmly.
- Interlock the tiles together as you go, ensuring a tight fit.
- Use a roller or apply pressure to ensure full contact with the adhesive.
- Allow adhesive to cure as per the manufacturer’s instructions before using the gym floor.
Step 5: Cutting and Trimming Tiles
For a clean, professional finish:
- If placing tiles against a wall or edge, trim off the interlocking lugs for a straight edge.
- Use a sharp Stanley knife and straight edge for precise cuts.
- Score the tile multiple times, then bend and slice through the cut line for a clean edge.
- Double-check the fit before making final cuts.
After Installation: Cleaning & Maintenance
- Vacuum or sweep regularly to remove dust and debris.
- Mop with warm water and mild detergent when needed—avoid harsh chemicals.
- Check seams and edges periodically to ensure tiles remain securely in place.
Final Tips for a Successful Installation
- Acclimate the Tiles – Allow the tiles to sit in the room for 24 hours before installation so they adjust to temperature and humidity.
- Start in a Straight Line – This helps keep tiles aligned and ensures an even layout.
- Use a Fresh Blade – A sharp utility knife makes cutting easier and cleaner.
- Work in Small Sections – If using adhesive, apply it gradually to prevent drying before tiles are placed.
By following these steps, you’ll achieve a professional-quality gym floor that is durable, noise-reducing, and long-lasting. Whether you opt for a dry lay or glue-down installation, SilentGym Interlock8 provides a stable and high-performing foundation for your workouts.
Visit our Fitting Instructions section for more detailed instructions relating to your specific application.
Check out our Soundproofing Guides for more information, advice and tips on all aspects of soundproofing.